This guide will serve as a general quick start guide for new developers who want to start developing plugins for Spigot.
Claim:
- Minecraft Java Edition (latest Release 1.15.2)
- IntelliJ Idea
- Server.zip – Contains spigot-1.15.2.jar and server files.
- Java 8 SDK
- Previous knowledge in object-oriented programming (Java)
- In this guide, Windows.
Step 1: Setting up a test server.
- Download Server.zip
- Unzip files and start “
StartServer.bat“ - When the server has finished, try to connect to it with Minecraft –> Multiplayer –> Direct Connect –>
localhost - If you successfully connect to the server so everything works as it should.

Step 2. Setting up the development environment IntelliJ.
- Create a new project and select “
Project SDK 1.8“ - Choose a project name, for example “
MineworldsPlugin“ - Select “File –> “Project Structure” and verify that the SDK is version 1.8 and “Project Language Level” Java 8.
- In “Project Structure” select “Libraries” and add “
spigot-1.15.2.jar” that library. (The same file that you received with the Server.zip) - In “Project Structure” select “Artifacts” and enjoy the +. Select “Jar — Empty”. Under “Available Elements”, double clicking “MineworldsPlugin compile output. At “Name” top, write the name of the project, ex “
MineworldsPlugin“ - then “Apply” and “OK”.
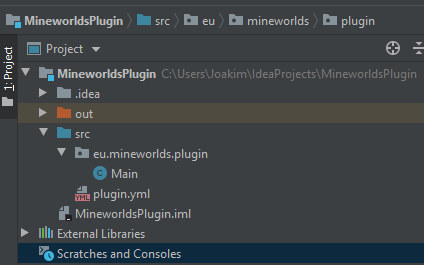
- Under “src” right click and choose “New –> Package”. Rename this “
me.dittnamn.pluginnamn” , or e.g. “eu.mineworlds.plugin“. - Right-click the package and select “New –> Class” and name it “
Main“. - Right-click on “src” select “New –> File and name it “
plugin.yml“.
Step 3. Enter plugin.yml as outlined below, but with your information. For documentation about what plugin.yml may contain click here.
main: eu.mineworlds.plugin.Main
api-version: 1.13
name: Plugin
version: 1.0.0
author: Jocke155
website: https://mineworlds.eu
Step 4. Start programming plugin. Examples of empty Main-Class below. Documentation spigots API is available here.
package eu.mineworlds.plugin;

import org.bukkit.plugin.java.JavaPlugin;

import java.util.logging.Level;

public class Main extends JavaPlugin
{
    @Override
    public void onEnable()
    {
        getServer().getLogger().log(Level.INFO, "Hello World!");
    }

    @Override
    public void onDisable()
    {
        getServer().getLogger().log(Level.INFO, "Bye World!");
    }
}
Step 5. Install and test the plugin.
- I IntelliJ, select “Build” top of the menu, since “Build Artifacts”. If no error message appears, you should have received a jar file called “Pluginnamn.jar” in the project “out — > Artifacts” folder. (ProjektmappoutartifactsPluginnamnPluginnamn.jar)
- Copy the jar file and place it in the server “plugins”-folder.
- Type “
reload” the server terminal or reboot the server. - If you have made the right, it should read “Hello World!” the server terminal when the plugin is loaded, and “Bye World!” when unloadas.
